532 字
3 分钟
从零配置MySQL绿色版
从零配置MySQL绿色版
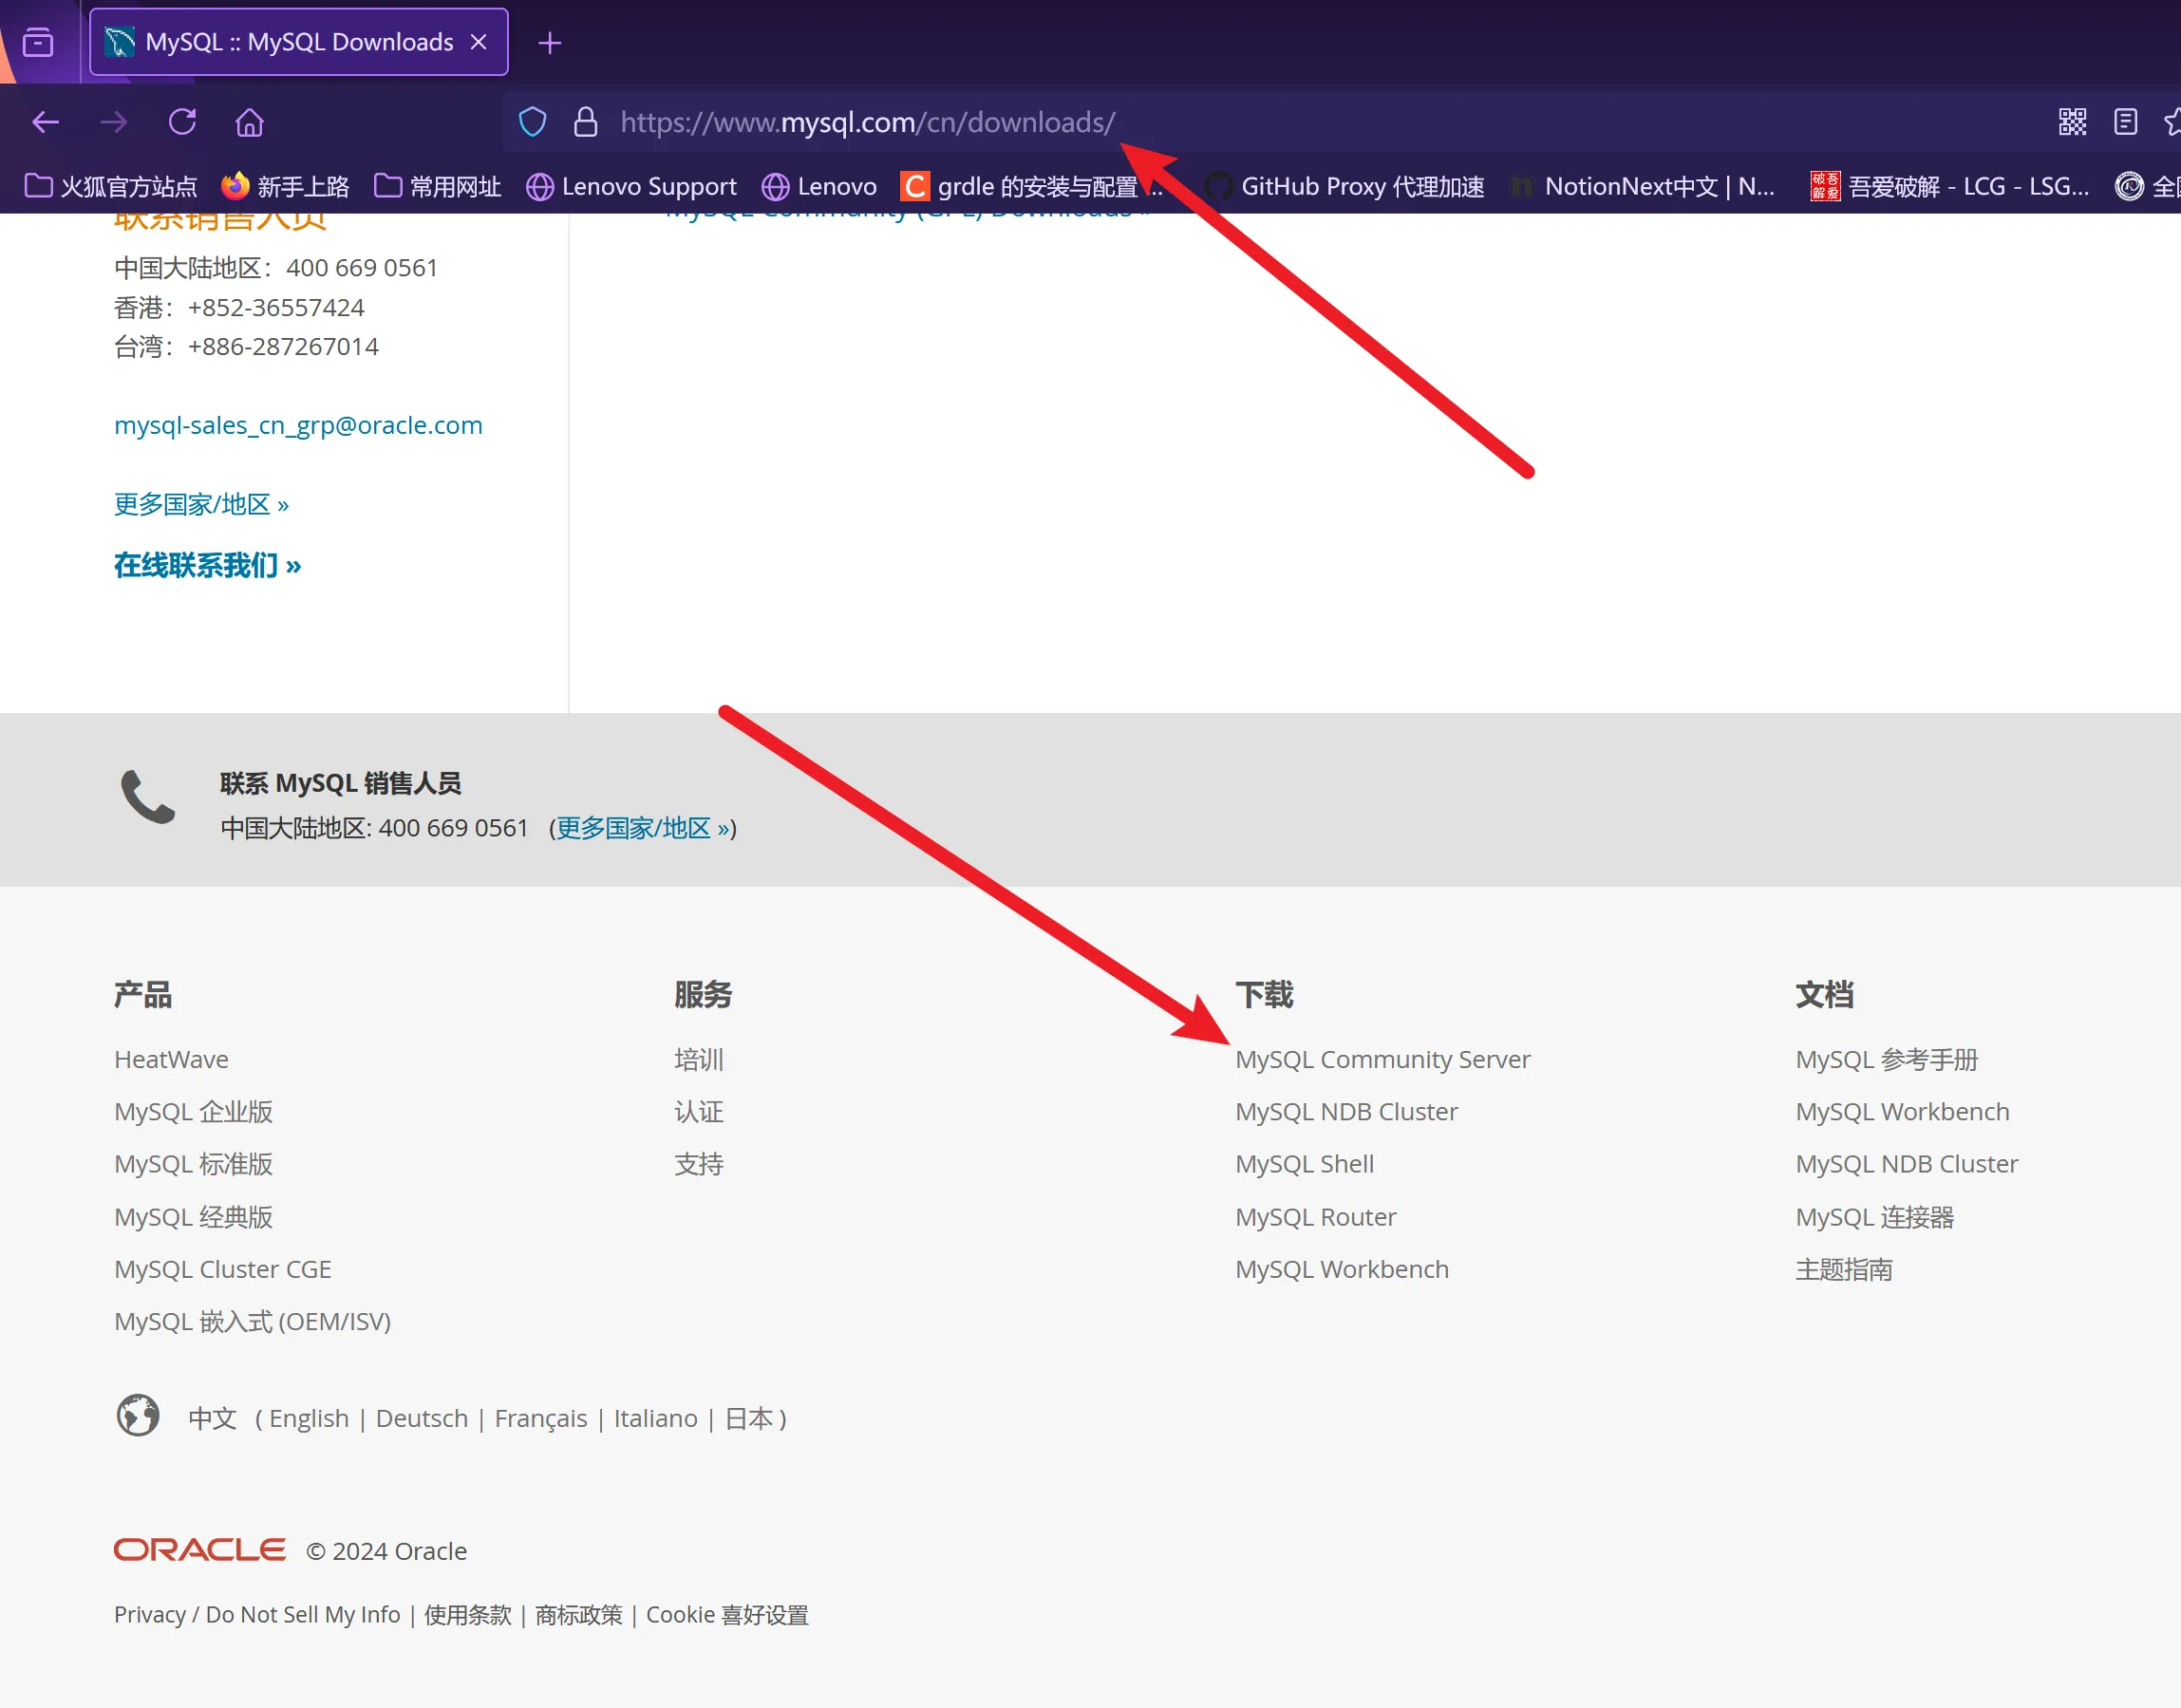
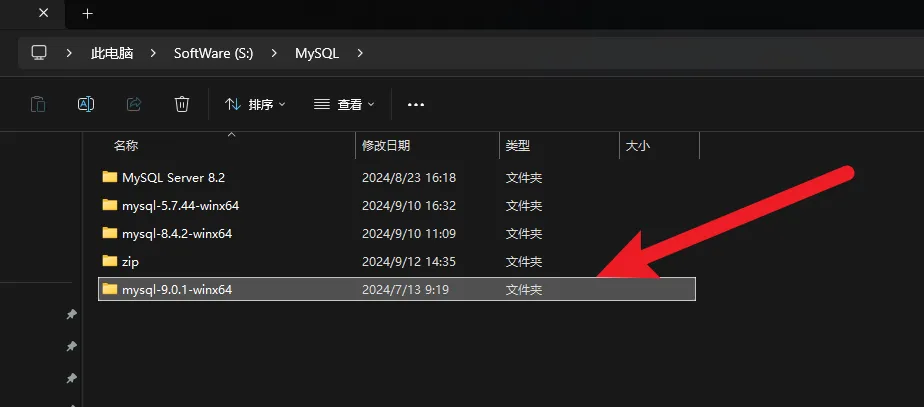
一、打开MySQL的官网,下载想要版本的MySQL、解压即可。我这里以MySQL9为例。

二、创建my.ini文件,并写入配置。
注意:Windows系统下是.ini文件,Linux系统下是.cof文件
主要修改的配置是[client]下的port;[mysqld]下的port、basedir、datadir
注意:这里只是部分的配置,更多的配置请查看文档,或者AI搜索
# For advice on how to change settings please see
# http://dev.mysql.com/doc/refman/5.6/en/server-configuration-defaults.html
# *** DO NOT EDIT THIS FILE. It's a template which will be copied to the
# *** default location during install, and will be replaced if you
# *** upgrade to a newer version of MySQL.
[client]
port=3309

[mysql]

#log-error=d:/mysql_log_err.txt
[mysqld]
port=3309
basedir=S:\MySQL\mysql-9.0.1-winx64
datadir=S:\MySQL\mysql-9.0.1-winx64\Data
character-set-server=utf8mb4
#连接空闲时间 30分
wait_timeout=1800
#最大连接数
max_connections=500

#开启事件
event_scheduler = 1
#开启慢查询日志
slow_query_log = ON
#slow_query_log_file = ../slow_query.log
long_query_time = 5
#禁用域名解析
#skip-name-resolve
#禁用TCP/IP远程连接
#skip-networking
#key_buffer_size=16M
#innodb_buffer_pool_size=4G
#innodb_additional_mem_pool_size=20M
#innodb_log_buffer_size=20M
#query_cache_size=40M
#read_buffer_size=4M
#sort_buffer_size=4M
#read_rnd_buffer_size=8M
#tmp_table_size=16M
#thread_cache_size=16
# Remove leading # and set to the amount of RAM for the most important data
# cache in MySQL. Start at 70% of total RAM for dedicated server, else 10%.
# innodb_buffer_pool_size = 128M

# Remove leading # to turn on a very important data integrity option: logging
# changes to the binary log between backups.
log_bin="k_logbin"

# These are commonly set, remove the # and set as required.
# basedir = .....
# datadir = .....
# port = .....
# server_id = .....


# Remove leading # to set options mainly useful for reporting servers.
# The server defaults are faster for transactions and fast SELECTs.
# Adjust sizes as needed, experiment to find the optimal values.
# join_buffer_size = 128M
# sort_buffer_size = 2M
# read_rnd_buffer_size = 2M

sql-mode="STRICT_TRANS_TABLES,NO_ZERO_IN_DATE,NO_ZERO_DATE,ERROR_FOR_DIVISION_BY_ZERO,NO_ENGINE_SUBSTITUTION"
log-bin-trust-function-creators=1
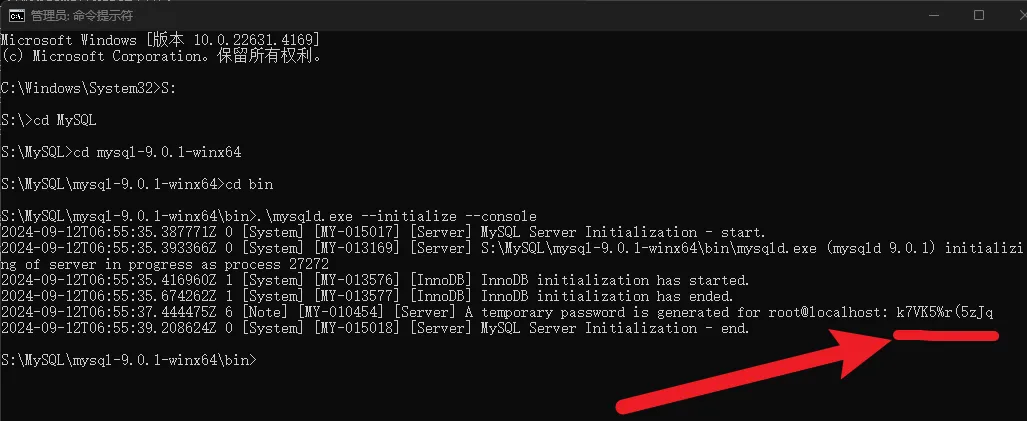
三、使用mysqld生成临时密码
使用管理员模式进入MySQL的bin目录下

使用mysqld执行—initialize —console命令 ,注意不同的命令行,调用mysqld的格式不一样,我这里是.\mysqld.exe —initialize —console记住这个临时密码
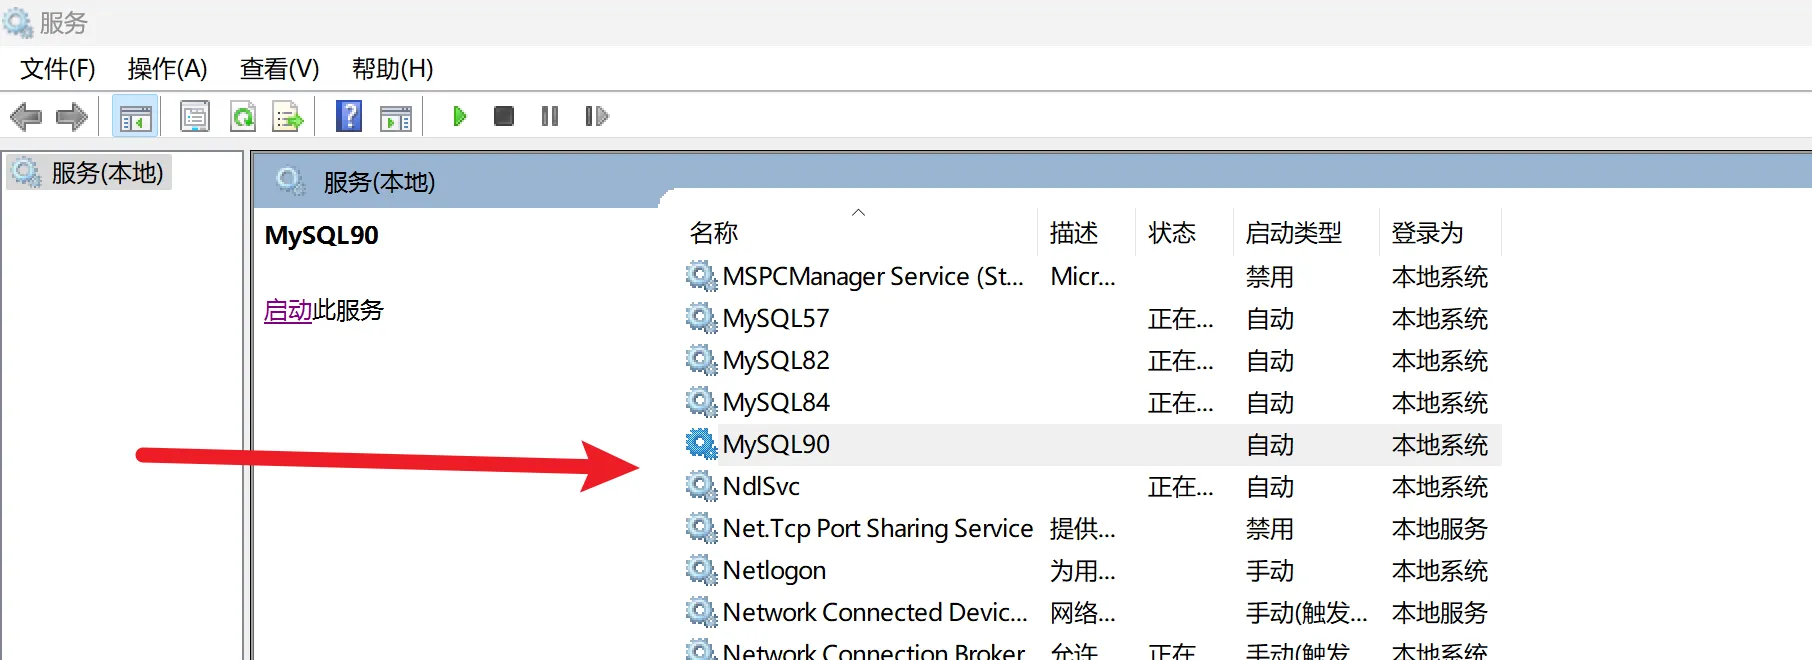
四、将MySQL服务注册到操作系统的服务管理中
注意:这里需要使用管理员模式
sc delete MySQL90
mysqld --install MySQL90 --defaults-file="S:\MySQL\mysql-9.0.1-winx64\my.ini"
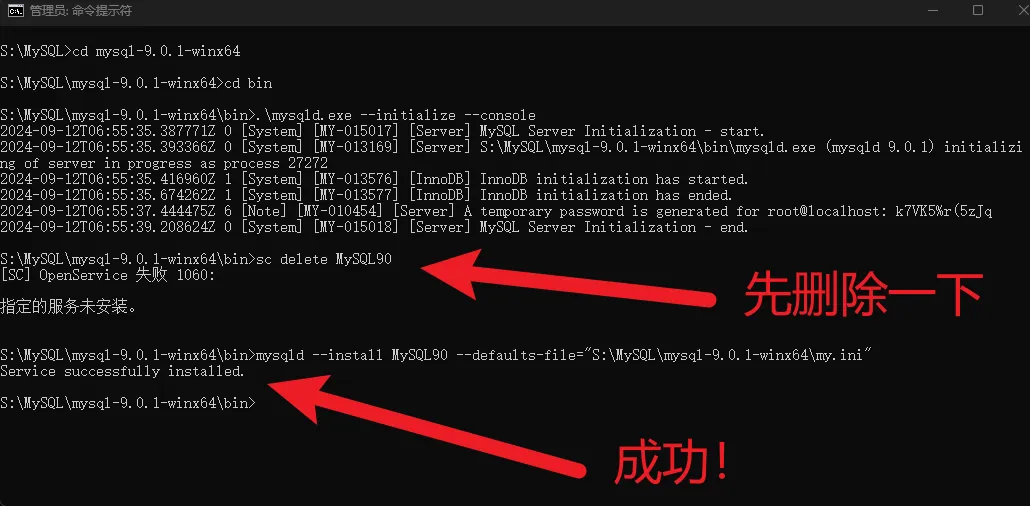
- 打开服务界面启动服务即可
五、连接数据库,并修改密码
这里需要使用步骤三 获取的临时密码
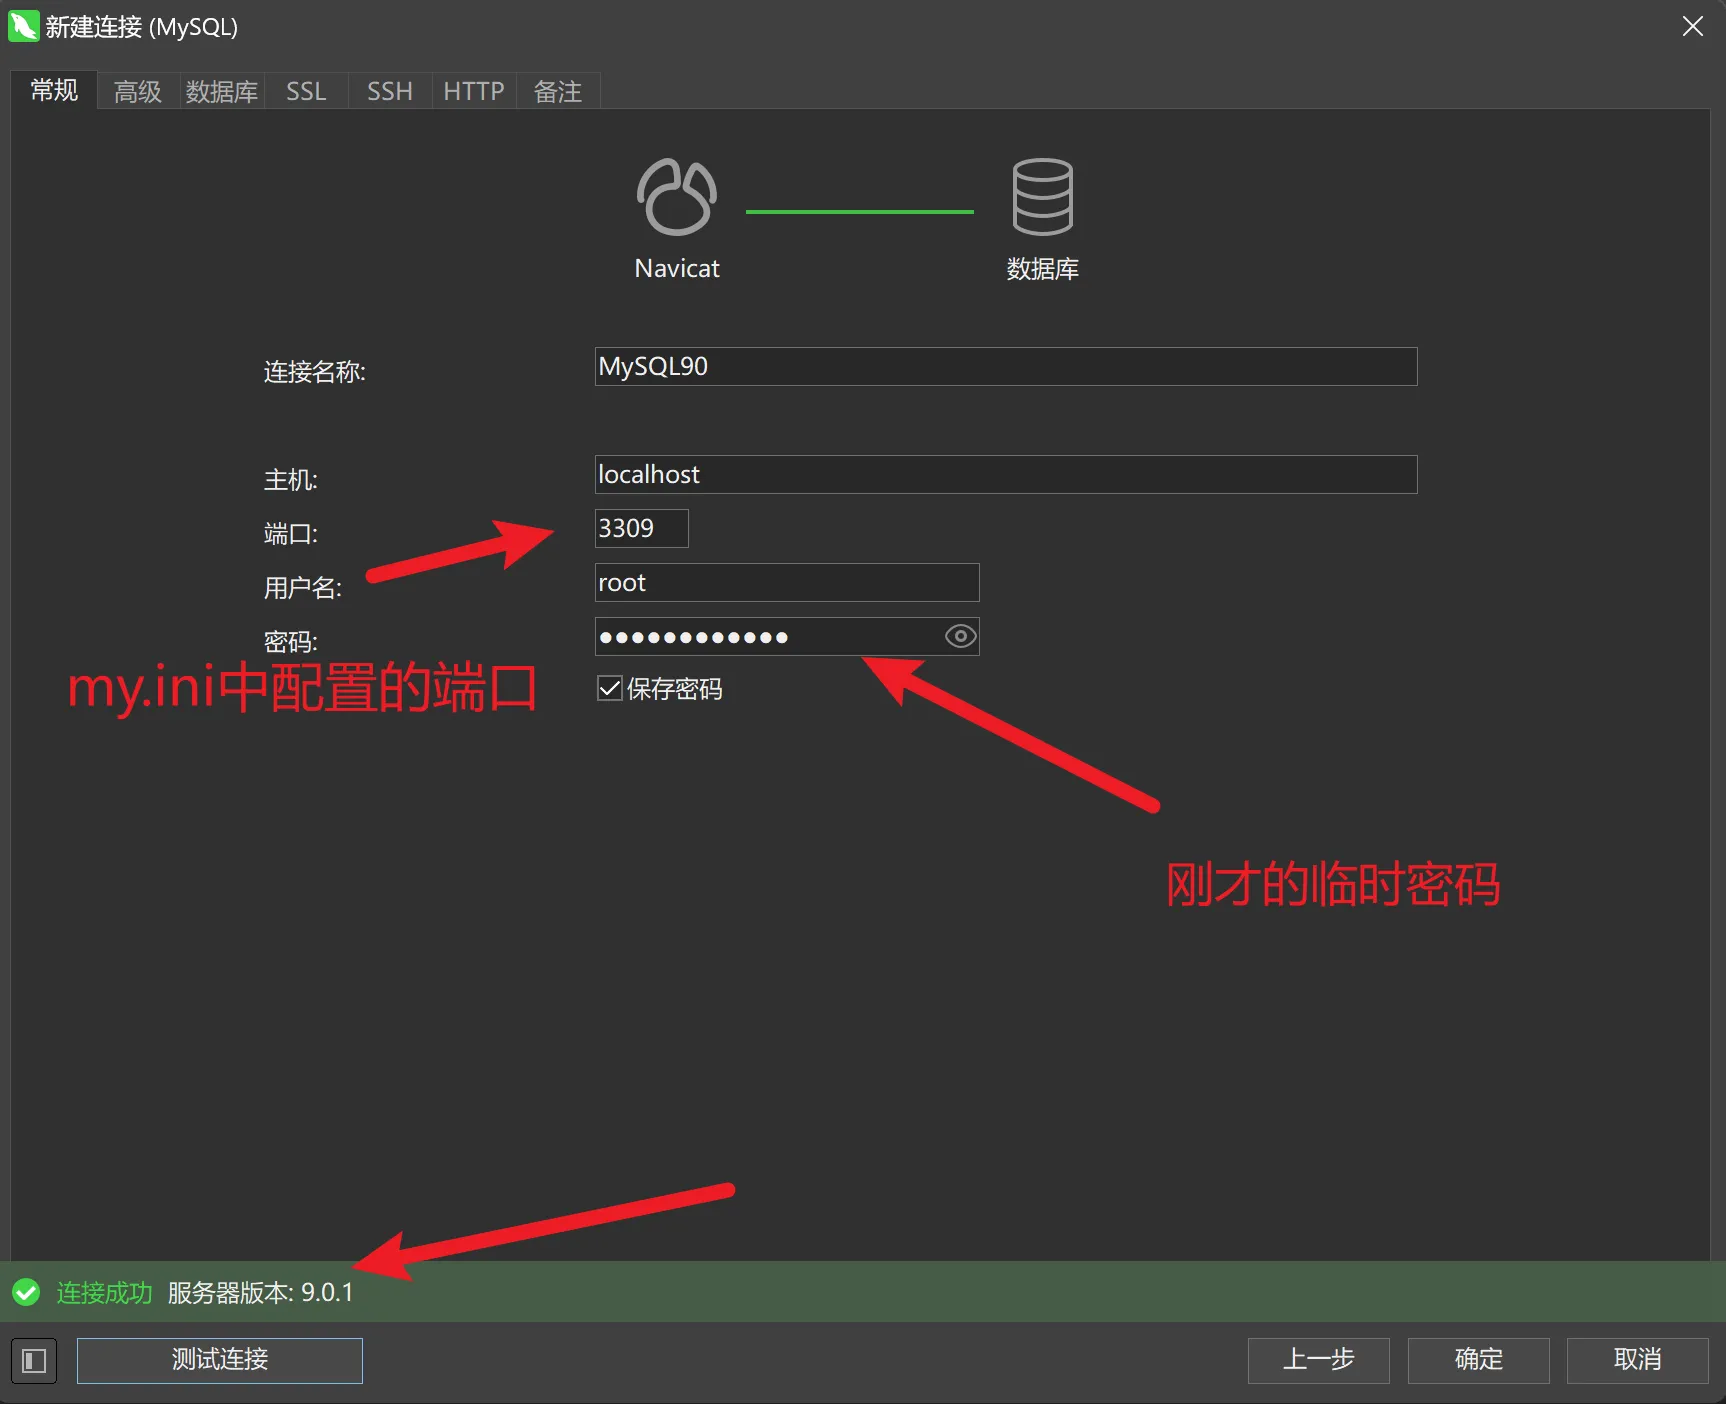
- 点击确定后,双击连接名称,会提示让输入新密码